When I switched from the dynamically typed language of JavaScript to the statically typed language of Kotlin, I realized that I had to familiarize myself with an entirely new IDE and file structure. While trying to deploy my first Kotlin application to Heroku, I couldn't find any concise guides to lead me through the process that also explain what configurations are required and why.
This post is the step-by-step guide that I wish I had when I first got started with Kotlin, Heroku, and IntelliJ.
Specifically, this guide describes how to generate a Kotlin API using the http4k Project Wizard, and goes over what configurations and steps you'll need in order to deploy it (and other Kotlin APIs) to Heroku.
What you’ll need before getting started
Previous experience with Kotlin, IntelliJ, and Heroku are not required for this tutorial, and beginners to brew and git should find the information they need as well!
- brew - used here to install http4k (an alternative method for Windows users is included below).
- git
- IntelliJ or another IDE that works well with Kotlin - there will be tips specific to IntelliJ in this guide.
Install http4k and heroku
Http4k is a library that provides a simple and uniform way to serve, consume, and test HTTP services. Below are the instructions to install using brew. Windows users can skip this step, and instead use the online Project Wizard to generate and download the initial application (the steps and options for the Project Wizard listed below will still apply).
brew install http4k
http4k --version
// http4k Toolbox CLI v4.0.0.0
Now, let's install Heroku (an installer is available for Windows users):
brew install heroku
heroku --version
// heroku/7.59.1 darwin-x64 node-v12.21.0
Run the http4k CLI Project Wizard
Http4k comes with a built-in Project Wizard that can be run through the command line, or through the online visual interface. We'll be using the CLI here. First, navigate to the directory you want to create your project in:
http4k generate project
We'll be using the default options in Sections 1-3 — feel free to just hit enter on the following steps:
-
Project core
- What kind of app are you writing? (Server / default)
- Do you need server-side WebSockets or SSE? (No / default)
- Select a server engine (Sun HTTP / default)
- Select HTTP client library (Java HTTP / default)
-
Functional modules
- Select JSON serialisation library (none / default)
- Select a templating library (none / default)
- Select any other messaging formats used by the app (none / default)
- Select any integrations that catch your eye (none / default)
-
Testing
- Select any testing technologies to battle harden the app (none / default)
For the remaining sections, we'll be deviating from the default settings a bit:
-
Application Identity
-
Main class name [HelloWorld]
-
Let's use:
KotlinHerokuAPI
-
Let's use:
- Base package name [com.example] (com.example / default)
-
Main class name [HelloWorld]
-
Build Tooling
- Select a build tool (Gradle / default)
-
Select a packaging type
-
We'll be using
Option 3for ShadowJar, which is a plugin that helps package our API into an executable jar file.
-
We'll be using
You should now see a new directory called KotlinHerokuAPI containing our project.
Open Project in IntelliJ and Test the API Locally
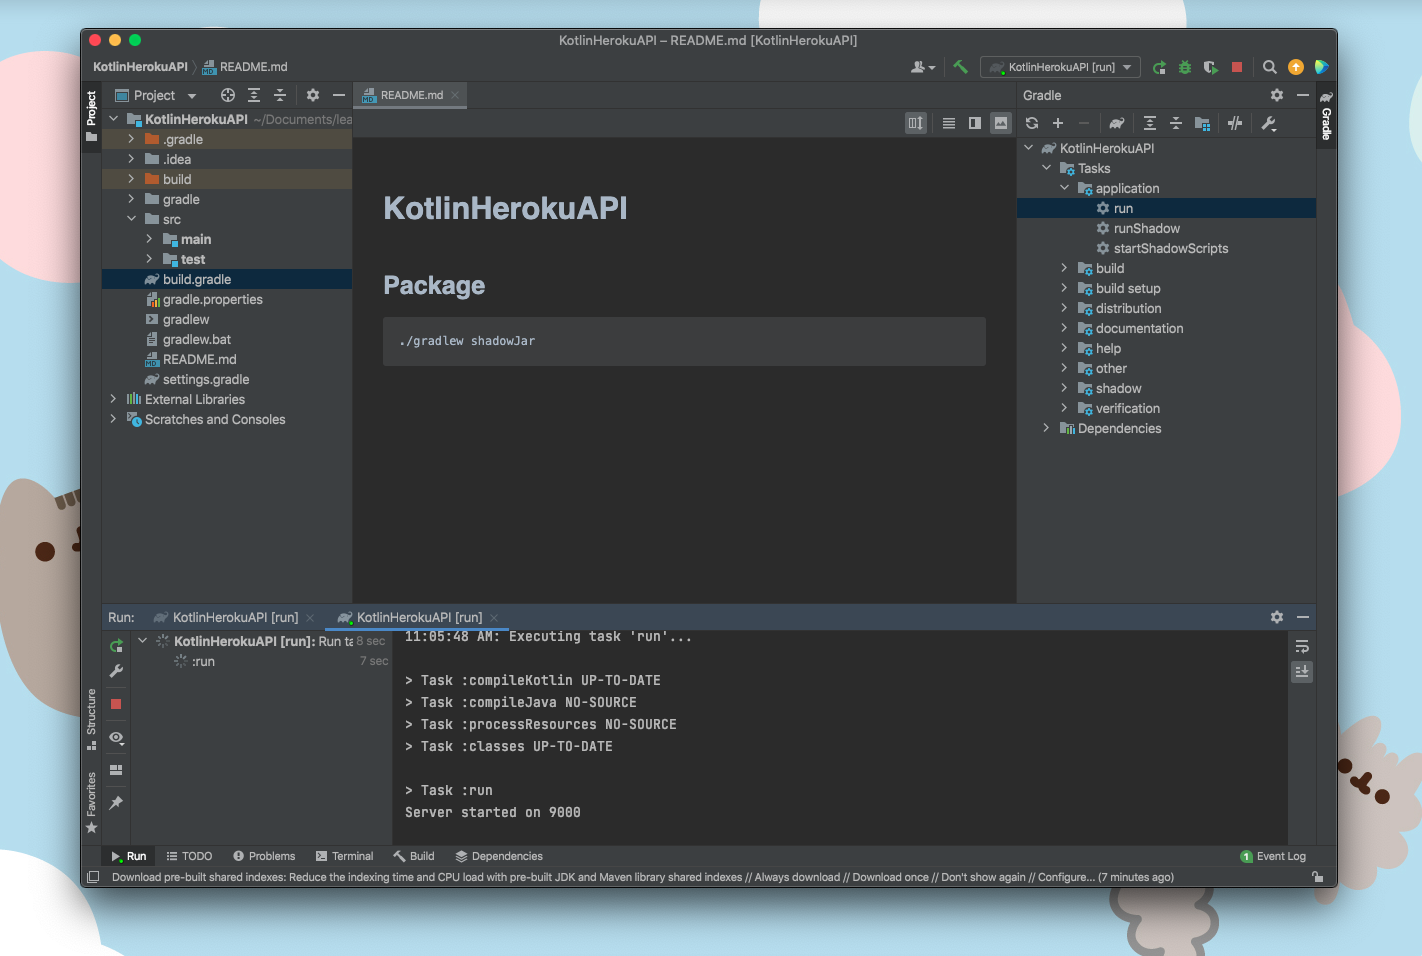
Now let's open the KotlinHerokuAPI project in IntelliJ and run the application. On the very right-hand edge of the IDE, you should see the vertical text "Gradle" — click on this. Then, navigate to KotlinHerokuAPI > Tasks > application, and right click on "run" and select "Run 'KotlinHerokuAPI [run]'":

You should see "server started 9000" in the output, as shown below.
Now, visit http://localhost:9000/ping in your browser to check to see the app is running properly (you should should see the text "pong").
Initialize Git and Make Your First Commit
Let's create a Git repository for our project, add a .gitignore file, and make our first commit. From the root directory of your project:
git init

cat>.gitignore
.idea
.gradle
build
// use `ctrl d` to finish creating the .gitignore file

git add .
git commit -m "Set up http4k app"
Add Code and Files Required by Heroku
Now let's add the files and configurations required by Heroku to deploy our Kotlin API.
Port var
Currently, our API always uses port 9000, but we need it to use the port that Heroku sets via the $PORT environment variable.
In the KotlinHerokuAPI.kt file located in src/main/kotlin/com.example, add the following code to get the environment variable before line 23:
val portNumber: Int = System.getenv("PORT")?.toInt() ?: 9000
After that, we'll want to use the new portNumber variable when we start our server:
// the following line
val server = printingApp.asServer(SunHttp(9000)).start()
// should now be:
val server = printingApp.asServer(SunHttp(portNumber)).start()
If you stop the application and rerun it, everything should still work the same locally because we set portNumber to default to 9000 if no $PORT variable is set.
Procfile
Heroku requires a Procfile, which contains the commands that are executed by the application on startup. This time, let's use the terminal inside of IntelliJ — click on the tab at the bottom of the application, as seen in the following screenshot:
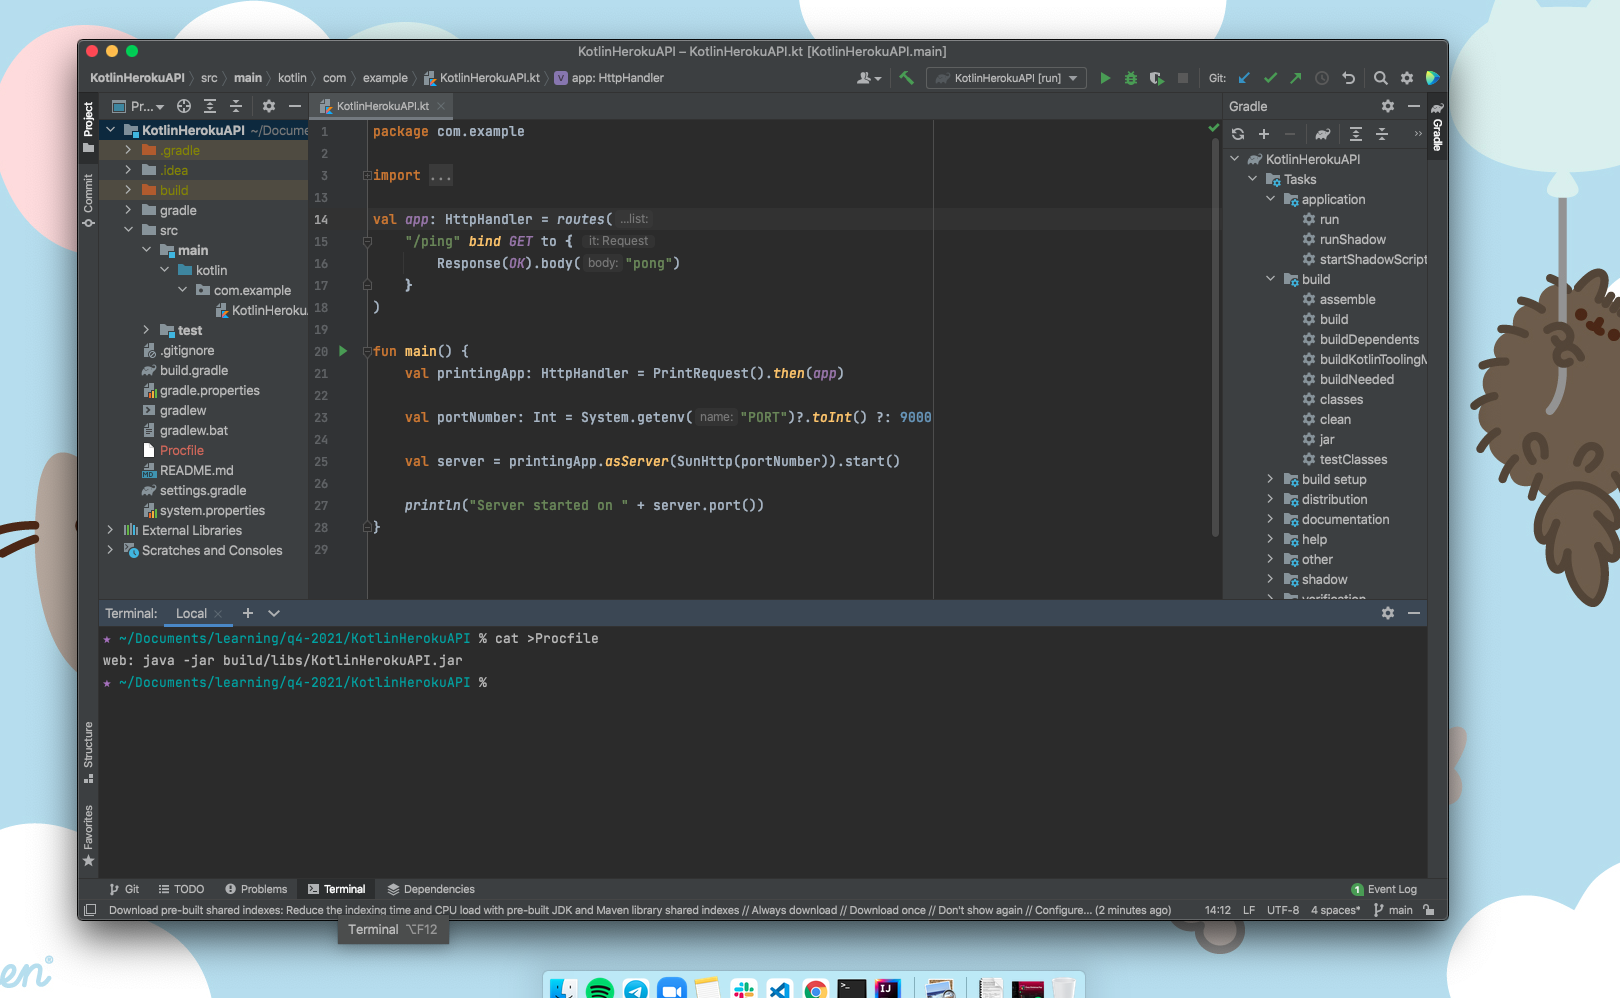
The commands to create the Procfile and its contents are as follows (KotlinHerokuAPI.jar is the name of the file created when Heroku runs gradle shadowJar):
cat>Procfile
web: java -jar build/libs/KotlinHerokuAPI.jar
// use `ctrl d` to finish creating the Procfile
system.properties File
Finally, we'll need to specify the Java version we're using for Heroku, using the system.properties file. Create an empty file however you'd like, then add the following line and save:
java.runtime.version=11 // your version may differ, see below
To figure out which version of Java you should point to, open the build.gradle file located in the root of your project. You should be able to find a line that describes which version of Java is being used — the following was on line 36 at the time of writing this:
sourceCompatibility = JavaVersion.VERSION_11
Deploy your Heroku App
Commit changes made
We'll need to commit any changes we've made in order to deploy to Heroku:
git add .
git commit -m "Use env var for port, add Procfile and system.properties"
Log in to Heroku
Next, we need to log in to Heroku using the command line. Use the following command, which will prompt you to open the browser to complete the login process:
heroku login
Set the GRADLE_TASK variable
Heroku is going to build our application on its servers using the task defined in GRADLE_TASK. This defaults to "build", but since we need the jar generated by running shadowJar, we need to change the default.
First, create an app on Heroku:
heroku create
Then, set the app's config variable for GRADLE_TASK:
heroku config:set GRADLE_TASK=shadowJar

// to confirm the above was successful:
heroku config:get GRADLE_TASK // should return `shadowJar`
Deploy your app
Finally, the most exciting part! To deploy the application to Heroku, and open it up in the browser:
git push heroku main
heroku open
When the page in the browser opens, append /ping to the end of the url, and you should be able to see the API in action!
If you want to view the logs, which is helpful for debugging issues, just use:
heroku logs --tail
I hope this guide helps save you some time when using Kotlin and http4k with Heroku for the first time!