Building a microservice architecture with an API-driven approach affords numerous benefits.
It reduces work and complexity for developers, and encourages good hygiene and consistency across teams. Automation tools can turn system administration and operations tasks into nonevents.
Assembling an API-driven application that can work in harmony with other applications to form a robust system requires knowing good habits, and this article serves as a standard for getting your new application up and running with its teammates.
In this article, I will walk through the steps to set up a multi-module Maven project using an API-Driven approach and some common automation tools. I will focus on building two simple services that are supposed to do a very important job: whenever the public API is called, it calls another microservice through its API and provides the output.
Prerequisites
I created the applications using Java, Spring Boot, and Maven.
Source Code
You can find the complete source code on my GitHub.
Structure and Setup
In this article I will create a multi-module Maven project to create a main application and a service. The main application will be reachable from the public, and will internally call the service application through its API.
Spring Boot’s documentation includes more about how to create a multi-module project.
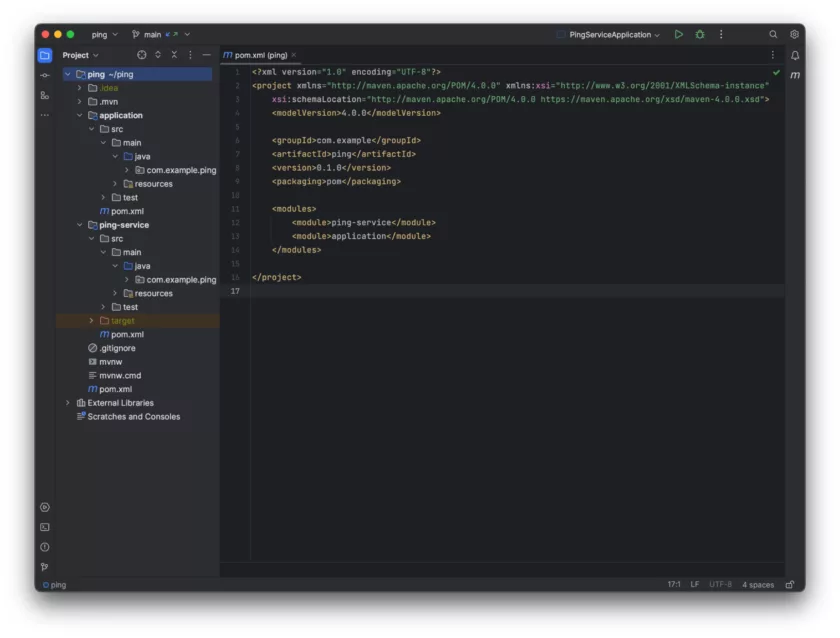
I will skip the basics by cloning the empty project and refactoring the modules and package name. Here is how the project looks after the changes:
To follow the step-by-step process, you can do the same by cloning the empty project.
git clone https://github.com/spring-guides/gs-multi-module.git
cd gs-multi-module/initial
Open the project in your favorite IDE; rename the project; and refactor the package name, modules, and class names to your desired names.
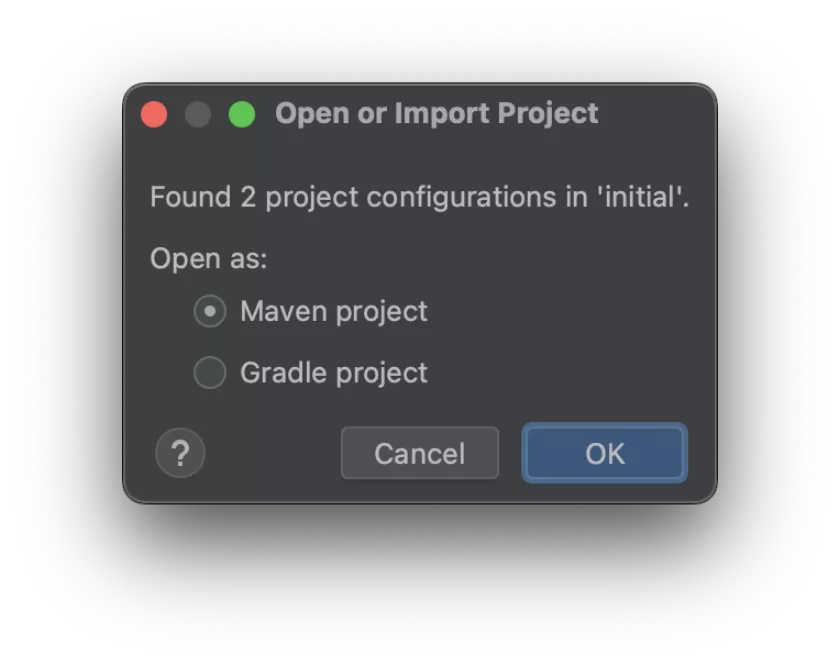
Note:
This project has Gradle and Maven configurations. In this article I use Maven, so when opening your project in your IDE, try to import the right configuration.
The project has two modules: application and ping-service. I’ll focus on the ping-service module first.
In the empty project that you cloned, this module is implemented as a service and it doesn’t have a server. Change the dependency in the ping-service module’s pom.xml file from
spring-boot-starter
to
spring-boot-starter-web
This change makes sure that this module uses Tomcat as the default embedded container, like the application module.
OpenAPI Specification
In this guide I use the OpenAPI Specification to create the API definition, and to generate the required code for the server and client using OpenAPI generators.
The OpenAPI Specification, previously known as the Swagger Specification, is a specification for a machine-readable interface definition language for describing, producing, consuming and visualizing web services.
Service API Definition
In API-driven development, everything starts from API definition. Create an internal API by creating a yaml file in:
ping-service/src/main/resources/service-api.yaml
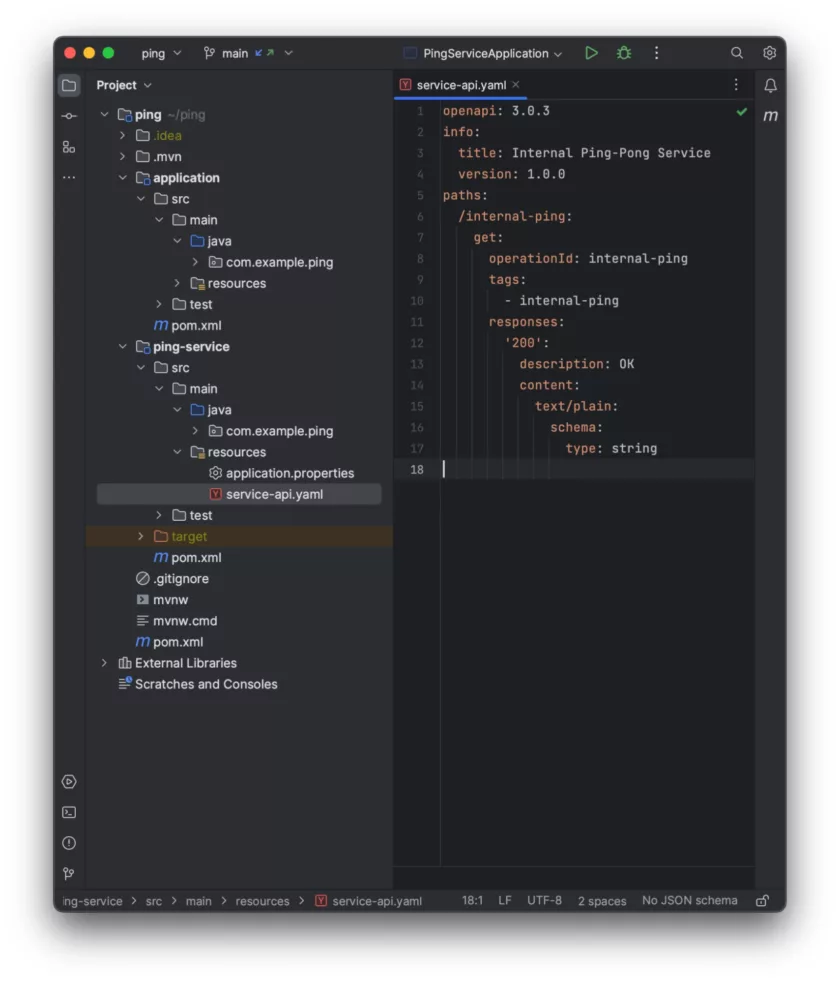
In this file:
Line 1-4: Sets the required keys (version and info) for OpenAPI Specification
Line 6: This is our endpoint path /internal-ping for the internal ping-service
Line 7: HTTP method is GET
Line 8: Once the interface is generated, internalPing will be the method name
Line 10: Tag is also used for the Interface name, I will implement InternalPingApi interface to provide the body
Line 11-17: A 200 ok with a pong response in a plain text format.
Please note that this is just a sample to give an idea of how to generate your microservice API using OpenAPI specification. In the real world, you might want to have a more detailed explanation of requests and responses.
OpenAPI Generators
Now It’s time to use a tool from OpenAPI to generate the required classes for the API definition. OpenAPI offers a lot of generators.
Integrating the API generation into the build system ensures that the latest version of our API specification is used in the services.
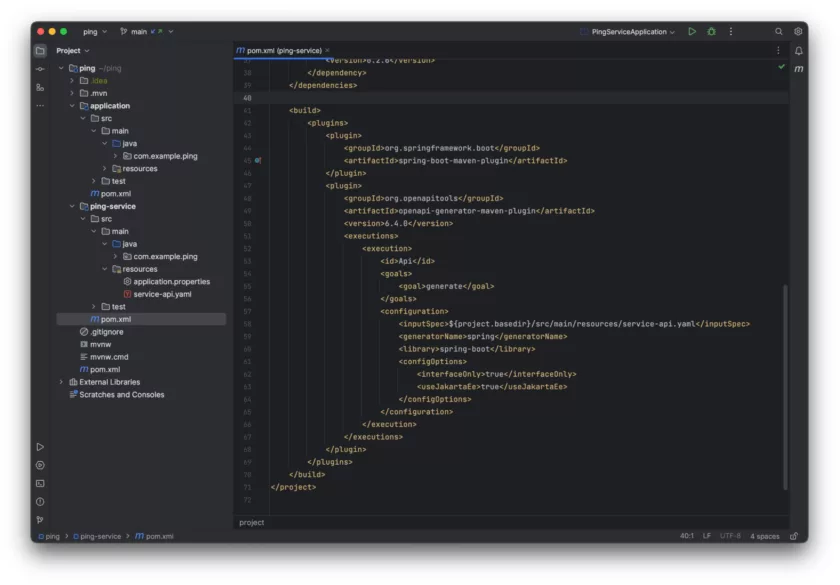
That said, Maven offers openapi-generator-maven-plugin
to support the OpenAPI generator project in generating the output. Add the plugin and required Maven dependencies as follows in the pom.xml of the ping-service module.
It’s time to compile the code, so that the plugin can generate the required code. In the terminal, run the following command in the project’s root directory:
mvn clean compile
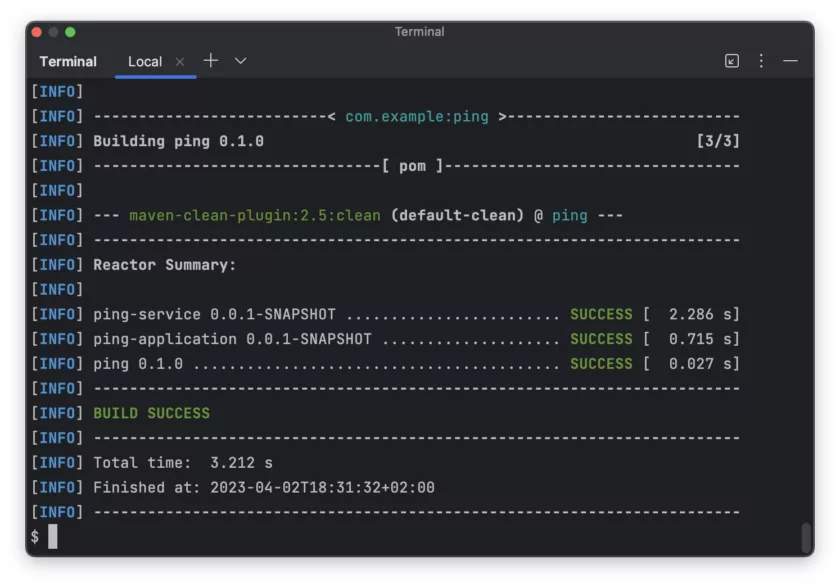
The application is successfully built! The next step is implementing the interface that OpenAPI generated for the endpoint — it’s as simple as that.
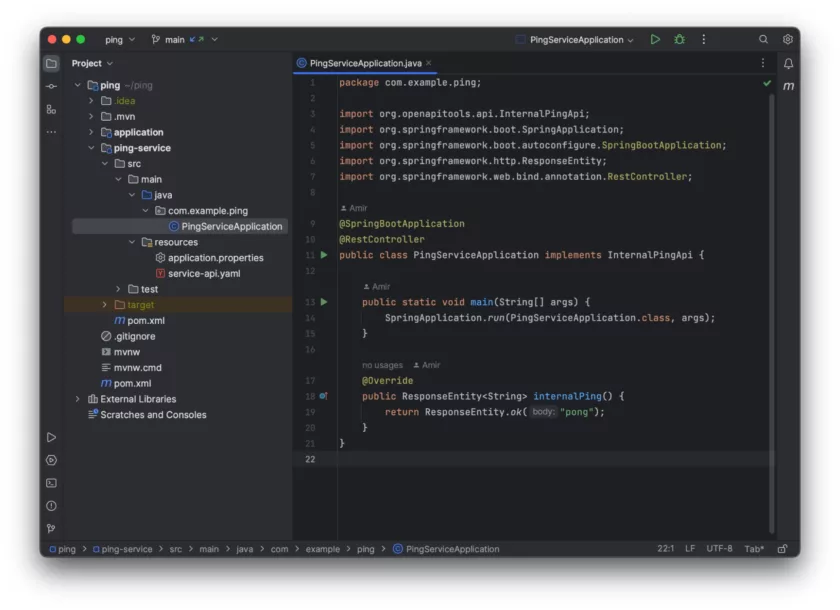
In this file:
Line 10: The @RestController annotation is a convenient annotation that is itself annotated with @Controller and @ResponseBody.
Line 11: The InternalPingApi interface is implemented from the org.openapitools.api package.
Line 17-20: This is the main body of the API, and it just returns a plain text pong string here.
The hard work — of creating an internal microservice that is responsible for returning a pong response when it receives a ping — is now complete.
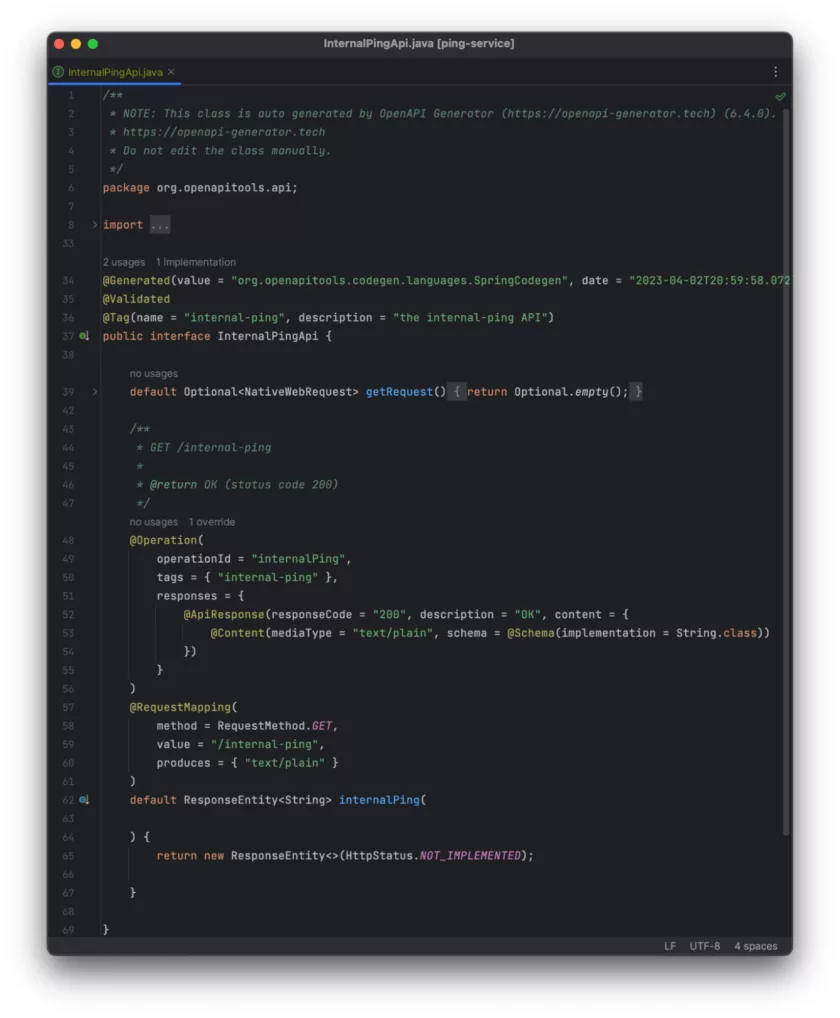
Wonder what the Interface looks like?! The interface and other generated classes are ready to peruse in
target/generated-sources/openapi
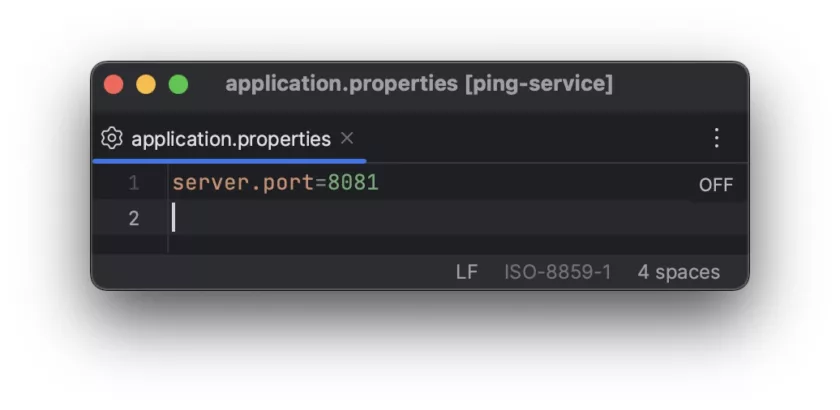
Now it’s time to change the application’s port. Set the port in the application.properties file:
Now I can run the application and call my endpoint. You can run the application in different ways, I use maven:
cd ping-service
mvn spring-boot:run
Wait a few seconds, and once the application is up and running, call the endpoint in another terminal using a curl command.
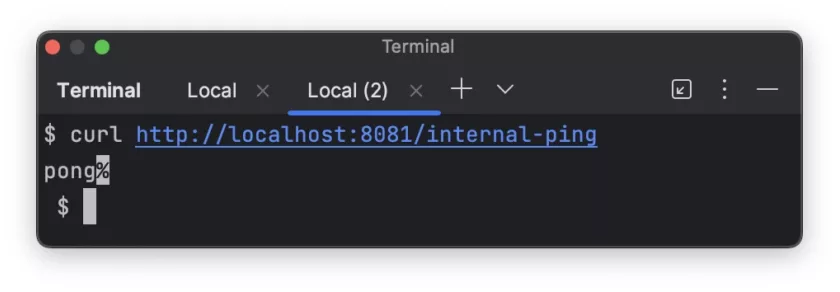
Note:
The percentage sign (%) at the end of the line indicates a missing newline character (\n).
Congratulations, you have successfully created an internal API.
Application API Definition
The next step is to consume the internal API that was just created. Start by defining the public API for the main application. The main application is exposing another API with a different path and response.
Create a yaml file in
application/src/main/resources/public-api.yaml
with the following content:
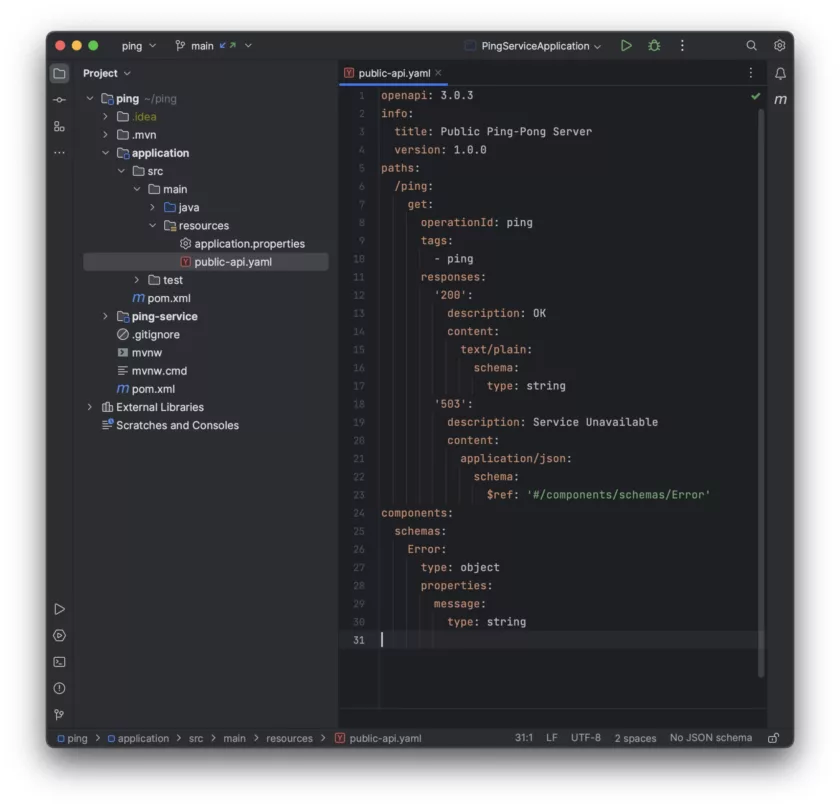
In this file, apart from similarities with the first file:
Line 6: This is the public endpoint path /ping for the main application.
Line 8-10: I removed the internal prefix and instead I just use ping.
Line 18-23: A 503 Service Unavailable response is added in the public API, the others are irrelevant.
Line 24-30: To create a json object with a string message key, in case of an error.
For simplicity, I only use two responses:
A 200 ok response, with a pong body, when everything is working fine and it’s able to communicate with the internal service
A 503 Service unavailable response, when there is something wrong and it could not call the internal service, in json format with a message.
You can add the same plugin to the main application’s pom.xml file to generate the server side code. After that, compile the code.
mvn clean compile
Similar to the other service, you could implement the generated interface to create the API.

But wait, the goal is to call the internal service to get the ping response. This is the moment that requires the internal API documentation, path, request, response codes, and everything related to consuming that API. This might be a time-consuming and error-prone experience. Again, using OpenAPI generators would help to generate the required client code, this time for consuming the internal API.
Now update the pom.xml file in the main application
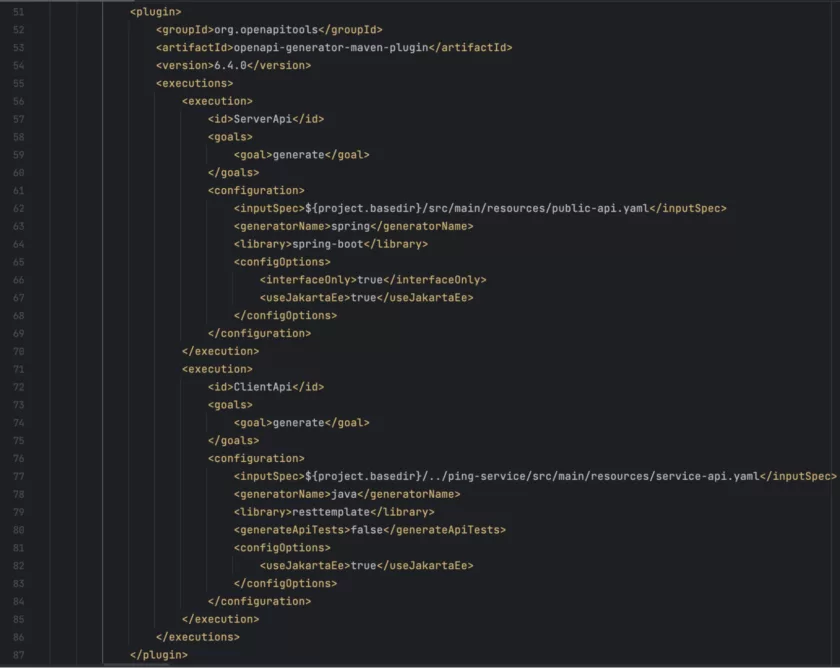
Notes on this file:
Line 56-70: This is the server-side execution to generate the interface that should be exposed in the main application.
Line 71-85: For the client part, I’m using Java as the generator name and resttemplate as the library.
You can learn more about other generator libraries in the OpenAPI documentation.
Now that the Maven configuration is updated, compile the code again and inject the internal API.
mvn clean compile
Now to implement the PingApi interface to expose the public endpoint. In the ping method, I use the injected InternalPingApi component to call the ping-service. Here is how the final code looks:
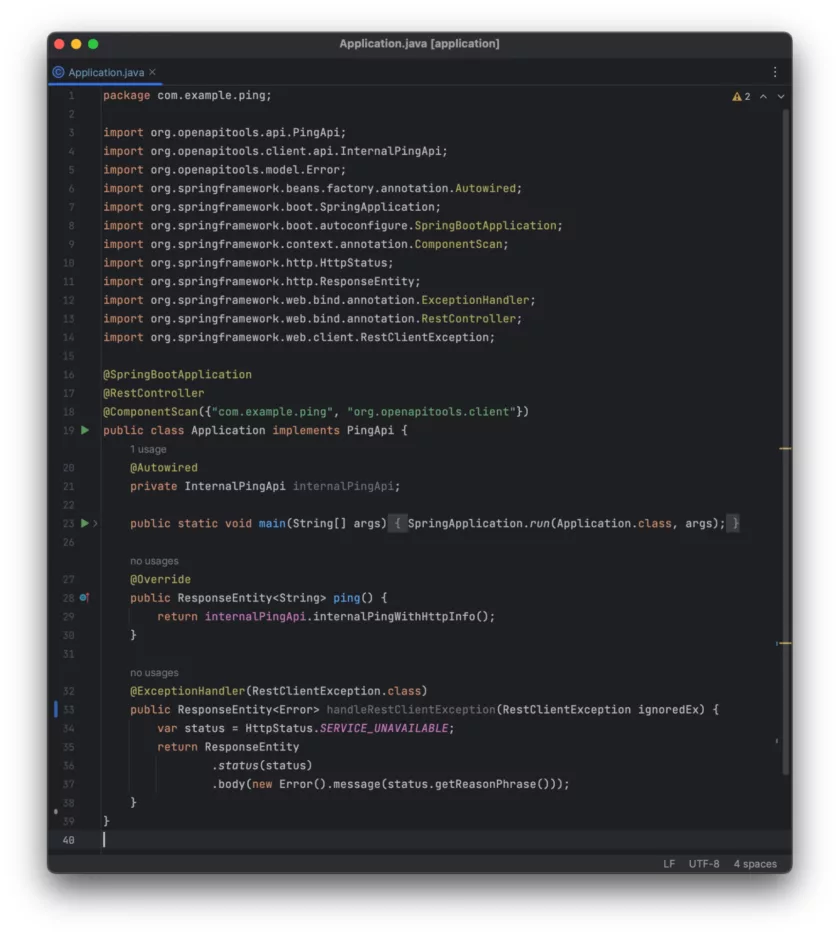
Notes on this file:
Line 18: To ensure that Spring can detect and load the generated components, which are located in a separate package from the main package, you could include the package in the @ComponentScan annotation. Another way to avoid this step is to configure the required properties in the Maven plugin.
Line 19: PingApi is the interface for the public API which we are exposing in the main application.
Line 21: InternalPingApi is the component generated by OpenAPI client execution.
Line 27-30: This is the main ping body that calls/consumes the internal service API.
Line 32-38: This is a simple exception handler, for times when there is something wrong calling the internal ping API. As promised in the API specification, this endpoint will return a 200 or a 503. If this section is removed and the internal ping service is down, and it cannot be called through the InternalPingApi component, it will result in a 500 Internal Server Error. This is not a perfect exception handling solution, just a simple one to give an idea of how to catch exceptions and act on them.
You can learn more about plugin configuration in the plugin’s README.
The application is not done yet. Because the ping-service application would be running on port 8081, I need to pass the right base path to the application — that’s why you’ll need more configuration.
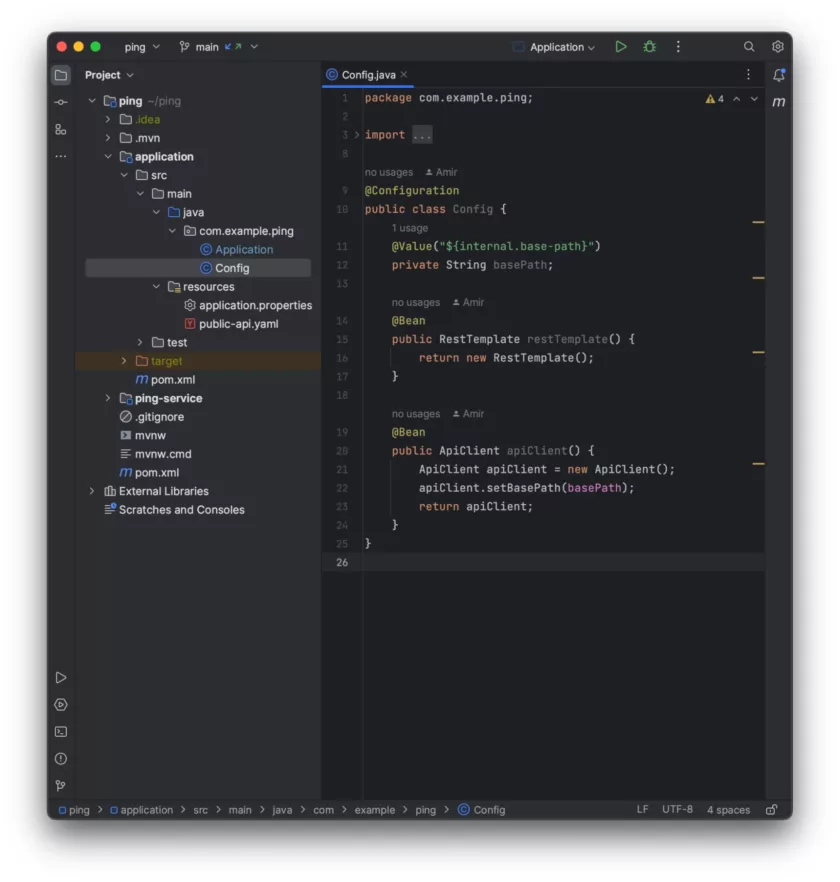
Notes on this file:
Line 9: I’m using the @Configuration annotation to define the beans
Line 11-12: The internal ping service’s base path is defined in application.properties of the main application, and it gets injected here.
Line 14-17: Since I used the resttemplate library in the OpenApi plugin, I need to define the RestTemplate bean.
Line 19-24: This is how I can customize the ApiClient code generated by OpenApi to set the base path.
Finally, take a look at the application.properties:
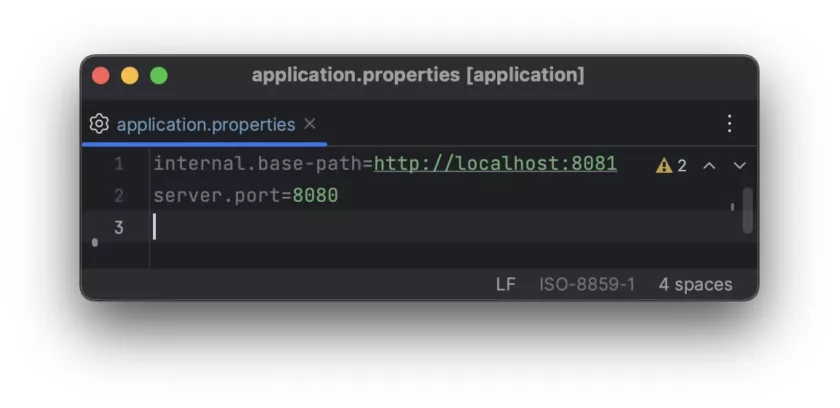
In this file:
Line 1: This is the internal service path
Line 2: The main application server port
Start up only the main application with this command:
cd application
mvn spring-boot:run
Once the application is up and running, start by taking a look at the API documentation. This is one of the other benefits of using an API specification: the full documentation is available for free.
Open the following link in your browser:
http://localhost:8080/swagger-ui/index.html
By taking the API-driven approach, not only have you created your endpoints; you also have documented them, and you don't need to worry about updating the API documentation every time you change something in your endpoint. Here is what it looks like:

You should have the same info for internal service. Now that the main application is running and the ping-service application is not, if I call the main application I will receive the following with a 503 Service Unavailable with a JSON body.
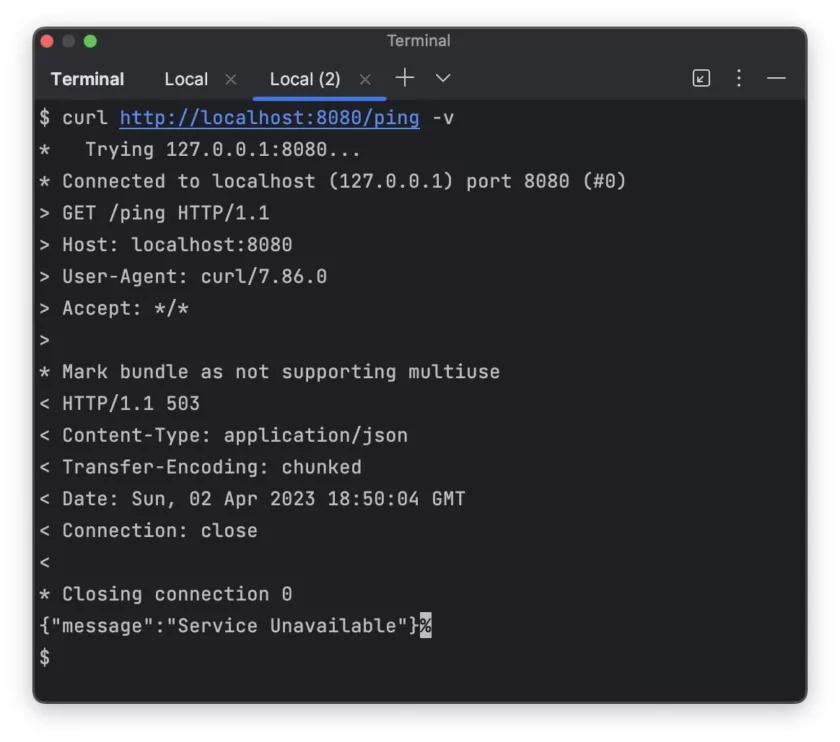
This is one of the benefits of microservice architectures: although there may be a failure in one part of the application, the main application is still up and running and probably serving the customers.
Keep the main application terminal running, and try to run the ping-service application in another terminal window.
cd ping-service
mvn spring-boot:run
Now call the public endpoint again, and I expect to receive the pong response coming from the internal service.
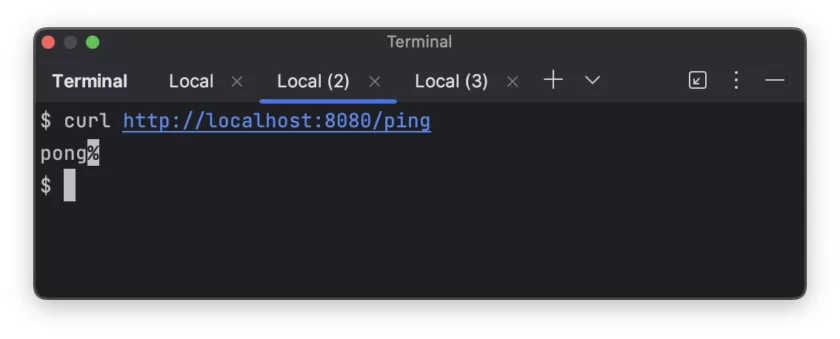
In real world applications, this might be a part of the endpoint’s response.
Conclusion
Using microservices helps to scale applications easier and have more reliable systems at scale, but they’re not without their challenges. Each new service presents another interaction layer, which presents another layer of complexity and potential for the unexpected.
In this step-by-step guide, I focused on the API-driven approach, which enables applications to be built with this complexity at its foundation. There are automation tools that reduce these challenges, and the benefits are bountiful. This approach prioritizes the ways that services interact with each other, just as a quality-focused approach to software prioritizes the ways that teams collaborate.